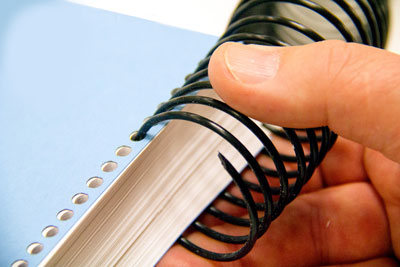
by Joe Bondonna, Spiral James Burn
For years people have attempted to come up with a better solution to binding large-sized documents using plastic coil. Some common quick fixes include:
- Jogging books into oval-shaped channels
- Inserters with rollers that have “gap space” adjustments
- 4:1 oval punching dies (oval dies can help)
- Inserters that use mandrel drive systems, allowing you to split the book in half
- Inserters with larger, more powerful rollers
All these are valiant attempts to solve the problem of large-format plastic coil binding. But most of the time for a document that is 40 millimeters thick, inserting the coil by hand is the only way that really works.
Tip #1: Use 3:1 pitch plastic coil.
The most common punching pattern for coil binding is 4:1 pitch. When binding a standard letter size document, there are 44 holes punched on an 11″ binding edge. This translates to 44 loops of coil that needs to get inserted into the document. Unfortunately, all these holes create friction, which restricts the coil and causes it to jam. This problem only gets worse as the book gets thicker because there is that much more friction.
By punching that same document using a 3:1 pitch die, there are only 33 holes punched on an 11″ binding edge. Because there are fewer holes, friction is reduced. Additionally, because the coil is spaced wider apart, 3:1 pitch plastic coil can be manufactured with thicker filament. This makes the plastic coil more rigid and easier to insert.
Tip #2: Use an oval punching pattern (3:1 pitch, of course).
When working with 3:1 pitch plastic coil, it is recommended to use an oval punching die (6.5×5.5mm). The key to this is using an oval hole die, trying to utilize a 3:1 pitch Wire-O round die doesn’t work well with these large books. When a thick book is being bound, the book will curve to follow the curve of the coil. As this happens, the punch hole “opening” is reduced. The expanded height of the 6.5×5.5mm oval hole provides sufficient space to keep this “opening” as free and clear as possible, so that the coil can wind its way through the punch holes unobstructed.
Tip #3: Use the right tools.
An old Chinese expression from an ancient text called the Analects of Confucius states “One must have a good tool in order to do a good job.” This is so true! We know that using 3:1 pitch coil and punching dies makes large document coil binding easier than using 4:1 pitch. There also are some special tools that will make a big difference in the inserting process. Here are a couple that work for us:
- Slantis Coil Binding Sleeves: These are designed to securely hold the document while providing for the curved binding spine that conforms to the radius curve of the plastic coil binding element. This makes coil insertion much easier, especially on larger-sized books.
- EZ Flex 100 Coil Inserter: This plastic coil inserter has been designed for use with the Slantis Coil Binding Sleeves for fast coil insertion on all plastic coil binding sizes, especially large coil documents. Unique in how the book stands upright in the slantis sleeves, these sleeves maintain the curve of the spine and the angle of the holes to match the coil. It has adjustable roller positions for high performance and easier coil insertion.
James Cash Penney, founder of the famous North American chain of department stores (JCP, also known as JC Penney), once wrote: “The keystone of successful business is cooperation. Friction retards progress.” The same concept is true with successful coil binding. By having supplies and tools that cooperate and retard friction, plastic coil binding for large documents can be done quickly and easily.
Joe Bondonna, product manager at Spiral James Burn, Totowa, NJ, has over 25 years of experience in the post-print finishing industry. You can connect with him on LinkedIn. For more information, call 973.256.0666 or visit www.spiralbinding.com.

