
By Jeff Peterson, editor-in-chief, PostPress
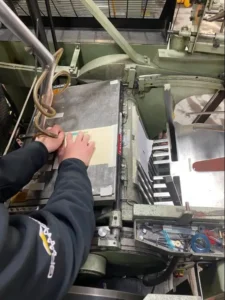
Working with clamshell-style foil stamping presses presents specific challenges on press. Correct set-up and makeready are critical to ensure a quality job and one that runs with few rejects and at speeds that provide an adequate ROI.
PostPress solicited the help of two experts – Mark Greenwald, Mark Andy Kluge, and Kersten Pankatz, PlatenWorks – to run through several scenarios on press and provide readers with recommendations to help solve challenges with paper stocks, inks and coatings, and more.
When working with difficult stocks with high surface tension, what recommendations can help with foil adhesion and coverage?
Pankatz: If coating the sheet after foil stamping is an option, that always is the best solution. Surprisingly, coating on top of the foil does not deter its sheen or brightness. If operators need to foil stamp over a UV coating, I suggest investing in a set of dyne count markers. The lower the dyne count, the more difficult it will be for the foil to adhere. There are foils that will stick to a dyne count in the upper 30s, and there are certain foil products that can work on a dyne count even toward the mid-30s. However, once a dyne is under 37 or 38, it most likely will not be stampable.
Running the press at a lower speed may help with high surface tension. A solution for a Kluge press is to string the foil in reverse (bring the foil down the back side of the press and under the press, then up over the die). Instead of pulling the foil away from the work, this method will release the foil more slowly with the sheet, resulting in a less violent release. Also, if the image is shark toothing (triangle-shaped areas where the foil is not adhering), try prepping the image area with sandpaper. Tape a sheet of fine-grit sandpaper over the die, back off the pressure a little and run the sheets through the press. Then remove the sandpaper and run the sheets back through with foil. Registration is extremely critical when attempting this method. I suggest operators run about 50 sheets at a time until they are sure it is working and staying in register.
Greenwald: I believe the adhesive on the foil is most important to battling high surface tension. There are several methods to help with the adhesion, including adjusting the heat and pressure and blasting air between the sheet and foil. Knowing all of the foil options available is critical. There are dozens of options through reputable foil suppliers, and operators should familiarize themselves with the different foil formulations to take the guesswork out of difficult jobs.
If embossing on a clamshell, what suggestions help to ensure the operator ‘bottom outs’ the embossing die to get the most detail out of the impression?
 Greenwald: Every customer asks the same question with an embossing job: “Can you make it any deeper?” I suggest operators talk to their engraving suppliers about their recommendation on how deep to make the die. They will want to know the paper stock being used and the press the embossing will be run on. The key is to not have the die made too deep or the makeready will be a disaster. Again, the engraver is the best source.
Pankatz: In many instances, I see dies etched or engraved much too deep. There is a misconception that the embossing die needs to be as deep as possible to create the best image. Work with the diemaker to get a die with a depth that works with the stock and the image. A die that is .024″ deep might work for a soft uncoated cover stock but most likely will not work on a coated text stock. I prefer a die more on the shallow side so I can iron out the grain of the paper. If the die is too deep, operators must back off the impression, giving a washed-out look, lacking detail.
Once on press, it is recommended to heat the embossing die for best results. With uncoated stocks, 175° is a good starting point. For coated stock with ink, around 125° is recommended. These numbers are a good starting point; adjust as needed. Heat will make the stock more pliable and easier to create a deep embossing. Another suggestion: To get more detail out of the embossing die, tape yellow engraver’s board over the counter. Increase the pressure, moisten the yellow board and run several impressions, beating the die into the board. Once the image on the board firms up, make a spot sheet under the plate to even out the pressure. Any weak areas can be spotted on the yellow board with .0015 spot tape. If the image is splitting or cracking, cover the die with embossed film or Mylar. If the embossed film gives out after several impressions, string up a roll of the embossed film and use it like a foil roll, drawing a new section of the film with each impression.
Refractive foil stamping is a great process to include image detail without embossing the sheet. Any suggestions for on press when working with a refractive (micro-etched) die?
Pankatz: When stamping with refractive dies, I recommend black polyurethane board as a counter. This allows dwell time with each impression and helps push the stock up into the die. Another option is to tape a sheet of smooth uncoated text-weight paper over the phenolic or epoxy board makeready. Raise the die temperature a little and use a foil with an easy release. Also, refractive images work best on coated stocks, producing a better refractive image. Uncoated stocks can dull out the foil when using significant pressure, which makes it difficult to see the micro-etching.
Greenwald: The August/September 2019 PostPress magazine included a refractive foil-stamped dragon on the cover. I was working at my family’s business, Scarab Printing Arts, at that time and was involved with the project. I remember testing several foils to achieve the best results. A heavier foil product commonly is recommended with refraction because it usually involves a larger image. We also performed tests on several makeready boards and settled on Redboard. It is much softer than epoxy glass or phenolic board, which makes it suitable for filling in the micro-etched lines on the refractive image. There are a handful of FSEA-member die and makeready suppliers that can help with incorporating refractive foil stamping into a print finishing repertoire. It is a creative way to add pizazz to a foil stamping job with a small additional investment.
When foil stamping or embossing to print or another foil-stamped image with tight registration, what should operators keep in mind on press to ensure a quality registered image?
Greenwald: The key to getting perfect registration on a clamshell press is all on the release of the sheet into the bottom gage blocks. Sheets must hit the blocks cleanly. Watching a machine when the sheets are hitting the blocks correctly is going to ensure proper registration. If there is any bounce in the sheet, the operator simply will not register the foil or emboss to the print and will need to make adjustments, most likely to the feeder head. Also, try moving the suckers and blocks around. I have seen operators have more success registering sheets with the suckers on the outside of the block, and others who prefer them on the inside – each with their own theories as to why one way is better than the other. Again, as with most makeready and set-up procedures, experiment and be creative. I explain that running a job is like running a race where the start line and finish line are in the same place, but the path taken to get to the end is up to the operator.
Pankatz: When registering foil or embossing to a printed image, be sure to match the gripper and guide with how the job was printed. Keeping the guide corner the same but switching portrait and landscape orientation can cause registration issues if the stock isn’t pretrimmed or square. If possible, lay out the job with the image that is stamping closest to the gripper and guide. Sheet curl and stretch become more pronounced the further the image is away from the guides. On a Kluge press, use the lower 1/8″ blocks for the head stops and side guides. This will minimize the buckling that can occur if the stock is curling. And it might be necessary to decurl the stock before loading the press.
A helpful move is to lock up a crop mark die off the edge of the sheet. Pull a stack out of the delivery, jog it up to the gripper and guide, and look at the mark to check registration. If possible, string foil over the die. Operators will know double sheets are being pulled if they encounter crop mark images without foil.
Thank you to Mark Greenwald, Mark Andy (Kluge), www.markandy.com, and Kersten Pankatz, PlatenWorks, www.platenworks.com, for their assistance with this article.