
By Brittany Willes, editor, PostPress
“It’s a yearly tradition at Tru-Cut to do an end-of-year promotional piece that we can give to our customers,” remarked Sales Manager Andy Archuleta. “It’s something that we all get excited about because it gives us a chance to really show off our talents.” In 2019, the company decided to go all out on its end-of-year piece, wanting to showcase a truly one-of-a-kind Christmas box. According to Archuleta, this began the “crazy, difficult and rewarding journey to the incredible box we ended up with.”
The design and creation of the holiday box required a massive effort from members of the Tru-Cut team, as well as outside sources. The box would feature Tru-Cut’s print finishing, steel rule die and laser cutting abilities, along with a number of other specialty effects. “I wanted to incorporate micro-etching, embossing, combo stamping and spot UV coatings,” Archuleta explained. With that in mind, Tru-Cut Graphic Designer Scott Coggin began developing artwork using a combination of custom and modified stock images to create a final design that was “an absolute monster” in the best possible sense.
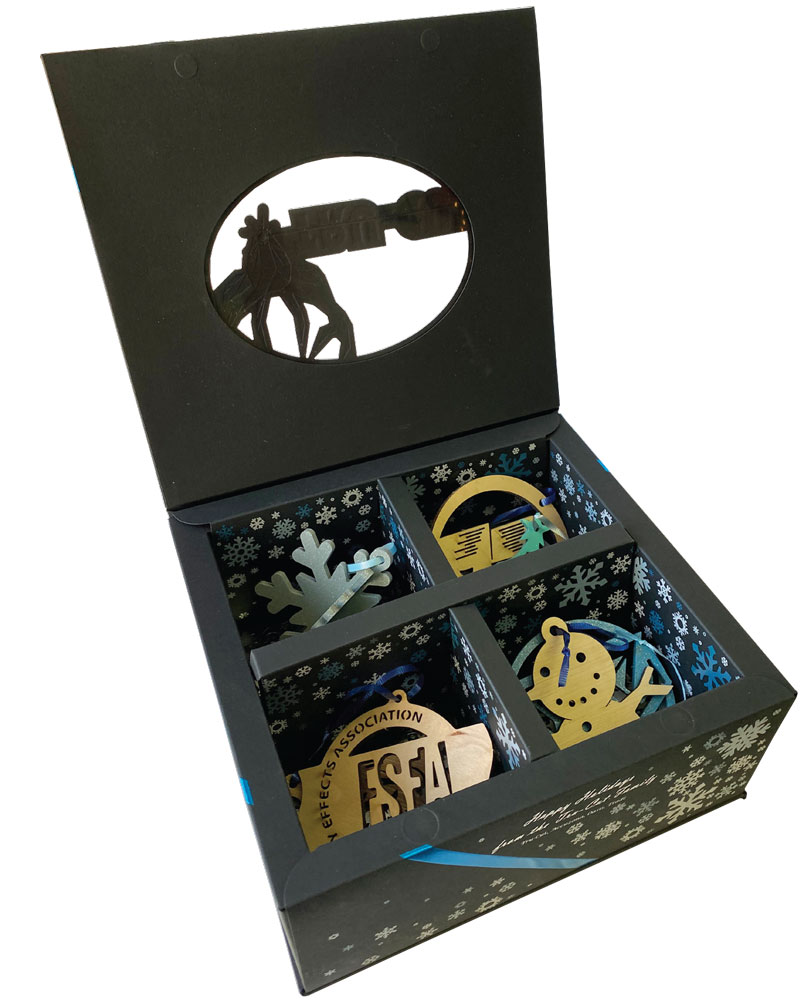
 The box itself was designed as a large hollow-wall box with four cavities on the inside – three for ornaments and one for chocolates. Right away, this presented a challenge as it was discovered the box would not fit on a single 28″ x 40″ sheet. As a result, the box was built to require two sheets each. “Our main CAD designers for the structure, Kevin Goodrich and Nicole Farnsworth, really knocked it out of the park with a cool revealed-edge bottom and top that would wrap around the main hollow-wall box,” said Archuleta.
With the overall structure in place, it was time to focus on the embellishments that would make the box stand out. “We knew, even at a small run of 350 to 400 boxes, that this was going to be quite an undertaking,” he said. In fact, the final box would require 13 passes through the presses. Four passes were needed to apply the spot UV – one clear and three colored coats. Two passes were required for the combo foil and embossed ribbon, with three passes for the main logo, a micro-etched foil stamp, print and emboss (plus the clear spot gloss), as well as a flat foil stamp on both the inside bottom and outside front. Finally, two passes were needed to emboss and deboss areas for the front magnetic closure with hidden sealed-in magnets.
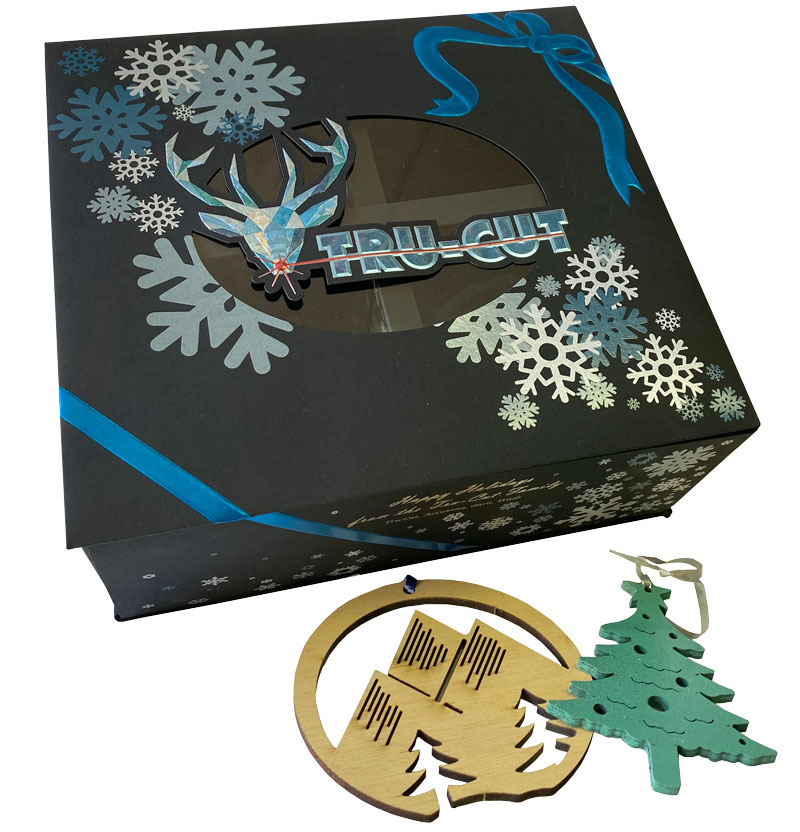
“We decided on a black box that would allow all the embellishments to really pop,” Archuleta explained. “We got some uncoated 18-point black folding board and started experimenting.” After experimenting with satin, gloss, soft touch and aqueous coatings, the final design utilized three coats of soft touch.
“I was worried about the paper curling too much or becoming brittle, but the soft touch actually made it very supple and gave it a luxurious coated feel,” said Archuleta. “This saved us a great amount of cost and gave us a very workable and good surface to stamp and work on.”
 As part of the Christmas theme, Tru-Cut adapted its usual logo featuring a laser burst and replaced it with a reindeer with a beaming red nose. The logo was printed 4-color offset on a Mitsubishi Diamond UV press and stamped with over-printed foil provided by Infinity Foils. A critical feature of the box, the logo also was micro-etched and featured a sculpted emboss that needed to line up with the graphics that were over-printed on the foil and sealed with spot gloss UV. Part of those graphics consisted of a hand-drawn, wraparound, combo foiled ribbon and bow that were matched up and fitted together seamlessly.
“Every single thing we incorporated on this box had to register perfectly to each other,” said Archuleta. To that end, Tru-Cut approached Universal Engraving, Inc. to make the micro-etch pattern die. “As soon as we saw the first stamp of silver with the micro-etch die, we knew we were onto something special. It looked amazing just by itself.”
Tru-Cut also reached out to one of its customers – International PaperBox – for assistance. “International PaperBox had the task of hitting this small patch of silver on a solid black sheet with a screened-back printed graphic to allow the foil and micro-etch to shine under the print,” said Archuleta. Once that was accomplished, Archuleta realized the ink would need to be protected. To do so, it was sealed with spot gloss UV, which allowed the ink to shine and pop off the paper.
Before the sheets could be embossed, the rest of the colored spot UV and combo foiled ribbon work had to be completed. “The ribbon running around the full box had to be combo stamped to make it look like the ribbon was sitting on the surface,” Archuleta stated. The process required some trial and error, but with the help of Universal Engraving, the sculpted foil and embossed detail was perfectly rendered.
With so many elements in play, it is little wonder the box presented some challenges. As Archuleta mentioned, the diecuts had to line up perfectly with the graphics, resulting in Tru-Cut designing and building two diecutting dies in-house. The boxes also had to be glued and assembled by hand, including inserting a clear window on the lid. “All of the gluing was hidden with folded-over panels to give a polished and finished look,” he said. Furthermore, to create the colored spot UV snowflakes, Tru-Cut had to get even more creative.
Using blue and white UV inks supplied by Graphic Inks, Archuleta began hand mixing the ink with Fuji clear coating, trying to get the right colors. “I had to get enough white in the mix to get the blue to show up on the paper,” he said. “I finally was able to get three distinct colors that were opaque enough to pop on the black and that matched with the colors that were printed on the main logo.”
The combo ribbon likewise presented its own special challenges. The etch on the die was fairly deep, and the combo foil/emboss would need to go over areas that were going to be scored and folded. “Anyone who has done combo work knows it is very easy to crack the paper on the edges of the stamp,” Archuleta remarked. “Plus, the paper wasn’t the most forgiving. It took us a bit, but we finally were able to get our pressures and temperature right to get a nice, clean stamp without breaking the paper.
In addition to the box, special Christmas ornaments also were created to fill the inside cavities. “Our CAD department had the idea to laser cut some ornaments out of all the wood we had lying around,” said Archuleta. After being laser cut, the ornaments were spray painted, assembled and tied with ribbon.
“We wanted to push the boundaries of what we usually see in this industry and invent new processes that could be repeated if customers wanted to incorporate these processes into their own pieces,” Archuleta affirmed. “It was a lot of trial, error and evolution through the process. Luckily, we have people with decades of experience and knowledge in all of these areas, and we knew many of our ideas were going to work if we pushed hard enough.”
Pushing hard certainly paid off. Several Tru-Cut customers stated the box was one they won’t be able to throw away. For Archuleta, this represents an incredible accomplishment. “To create a box that people feel is too nice to throw away…We don’t get that honor too often in this industry. To have our company name and logo right on the front is pretty neat.”
Tru-Cut’s Christmas box was submitted for the 2020 FSEA Gold Leaf Awards where it received a gold award for Best Use of Foil/Embossing – Self Promotion (Holiday).